DIY Landmine Press Machine
You would think with a name as nefarious as “landmine” the only thing that it would benefit would be the enemy. But the landmine press is everyone’s friend. A lot of people have put one end of a barbell into a corner and then loaded the other end with weight doing such diversive exercises as bent over rows, shoulder presses, squats, etc. But with the landmine press tool you get a more formal and regulated movement that doesn’t damage your floor or your wall.
 Some say there may be no better tool than the landmine to give every lifter access to superior strength training. I know I’m a believer. I hate squats but now with the landmine press I acquired a love for them based on the fact that I won’t be so afraid of back injury. The bar is in front of you and supported on the other end. It’s an excellent way to learn proper squat pattern.
It’s such an excellent tool for performing a variety of angular and rotational exercises. The very cool thing is you can buy one for a very affordable price or you can make one yourself. Let’s make one.
Most things in the gym are made of steel, although one very popular gym tool was made of wood: the Buff Dudes Power Rack. I’m sure we could figure a way to make a landmine press out of wood but in this case due to time constraints and raw material we decided to go the steel route.
TOOLS YOU WILL NEED:
- Sawz-All (Reciprocating saw)
- Welder
- Welding Helmet
- Grinder
- 60 Grit Disc for Grinder
- Tape Measure
- Marking Instrument (Soapstone)
- Straight Edge (Carpenter's Square)
- 1/2 Drill
- 1/2 Drill Bit
- Rags
- Lacquer Thinner
- Primer
- Paint Personal Protection Equipment (safety glasses, ear plugs, gloves, etc)
Materials We Used: (All materials are in inches)
- 1/4 x 12 x 19 steel plate ( the base of the Land Mine Press)
- 12 x 2 I.D. (inside diameter) pipe - schedule 40 or equivalent (the barbell end fits inside this pipe
- 3 x 1 I.D. pipe - schedule 40*
- 3 1/4 x 1 I.D. pipe - schedule 40*
- 4 x 2 1/4 x 2 - 12 gauge channel
- 2 3/4 x 2 3/4 12 gauge plate
- 2-4 x 1 1/2 Flat Iron
- 1/4 Round Stock or larger ( U-Bolt will work)
- 2-5 x 1/2 Bolts
- 8-1/2 washers
- 2-1/2 Nuts
*The 3 and 3 1/4 Pipe can have smaller I.D. we used what we could find which would eliminate the process of welding the washers onto the pipe to reduce its thickness to allow for the 1/2 bolts.
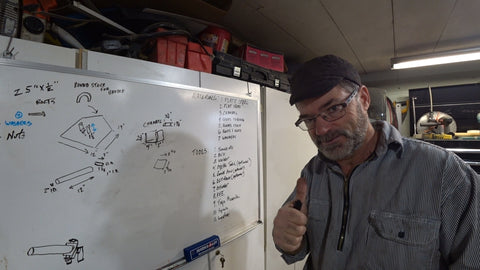
HOW WE MADE IT:
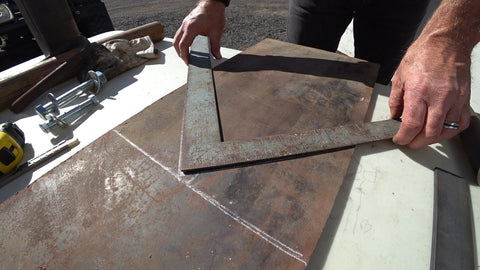
The base is plate steel. We used a piece of ¼ plate (or you can use a ¾ piece of plywood for the base, modifications for attaching the handle and the support brackets will have to be made). You can cut the base with a saw (reciprocating with metal cutting blades) or you could take the square piece and turn it diagonal so it fits into the corner of the room. Most landmine presses you see have a diagonal cut out of the end to accommodate placing them in the corner. ¼ steel is harder to cut than the pipe and flat iron we’ll be using so using plywood is just an alternative way to go for the base. The base (that is cut) measurement will be 12 x 19 inches. We measured 12 ½ inches up, marked the center at the top and drew our diagonals to that point. Thus allowing it to fit inside the corner of the room.
 Let’s cut the pipe. The first piece will be 12 inches long by 2 inches I.D. (inside diameter), this pipe will be the one the end of the barbell will fit into (if you have exhaust tubing that will work). You can use ¾ inch pipe that you can find at any hardware store for the smaller pipe, roughly 6 inches long. We found 1 ⅜ inside diameter pipe on the scrap pile so we used it. One piece will be cut 3 inches the other 3 ¼. Remember I talked about time constraints and raw material availability? The piece of channel we had to make was four inches and in retrospect the 3 ¼ piece of pipe that goes in between the channel could have been a ½ inch longer. Of course your channel width will determine the length of pipe that goes in the channel. Be sure to give it enough room to move.
Next we’ll cut a piece of 12 gauge steel or 3/16 inch thick steel 2 ¾ x 2 ¾ square. You will weld the 12 inch x 2 inch I.D. pipe to this. The 2 ¾ x 2 ¾ will then be welded to the 3 ¼ pipe centering the flat steel on the center of the pipe. This piece will go inside the channel and be the side to side pivot. Weld the other piece of short pipe, the 3 inch pipe, to the channel centering on the channel, this will be the up and down pivot.

Okay we’re getting close. Cut two 4 inch by 1 ½ inch by 3/16 inch steel pieces, these will be welded to the center of the base plate with 3 ¾ inches between them. Drill a ½ hole in each one of them near the top. These are the supports that hold everything together and provide for the up and down movement. Now let’s weld the handle on the end so the landmine press can be easily picked up and moved. We used a big U bolt and it was cut down to the height of 4 inches. The U bolt was 5 ⅕ inches wide, plenty of room to accommodate a hand (unless you’re a really big Buff Dude).
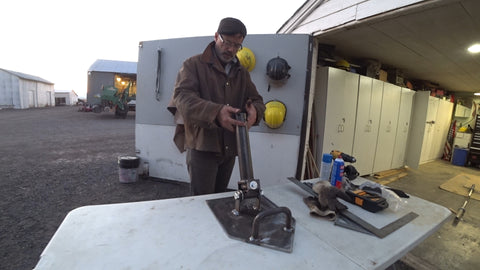
Now we’re ready to put it together. Two ½ bolts by 5 inches long with washers on the inside and the outside and then secured with ½ nuts, preferably lock nuts. Tighten the nuts. Of course the pipe welded to the channel fits between the two 4 inch by 1 ½ inches pieces that have been welded to the base. Hey this technical writing is not such an easy task. Then check the sweet movement of your new landmine press.
Clean up that steel, prime and paint to your desired color (if it ain’t Buff Dude Blue, you ain’t no Buff Dude - insert smiley face). Or leave it raw.
You did it. Good job, now put that baby to use. As with the Buff Dudes Power Rack I know there will be some creative and interesting improvements to the landmine press. I think that is cool when people do that. Hope you enjoyed the video and the instructions for building.
Until next time: Stay Buff.