Buff Dudes DIY Power Rack
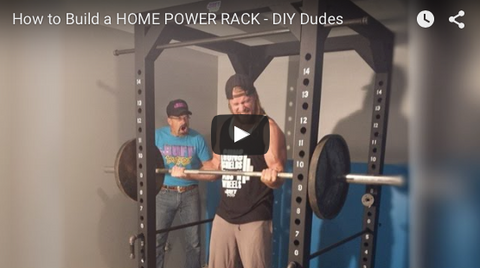
I never expected our little Power Rack video to get, [as of Sept 30, 2015], 288,150 views. But of course I'm glad it did. The best part is that people actually built it and sent in pictures to prove it as well a videos of themselves using it. That for me delivers a great deal of satisfaction. For me the DIY videos are something that usually have a very short time frame, like a weekend or a day or even part of a day just because I always seem to have a ton of other stuff to do. Like walking Samson my basset hound or cuddling with Buff Mom; she would of course point out the order of importance here - dog first, wife second. Well...back to the power rack.

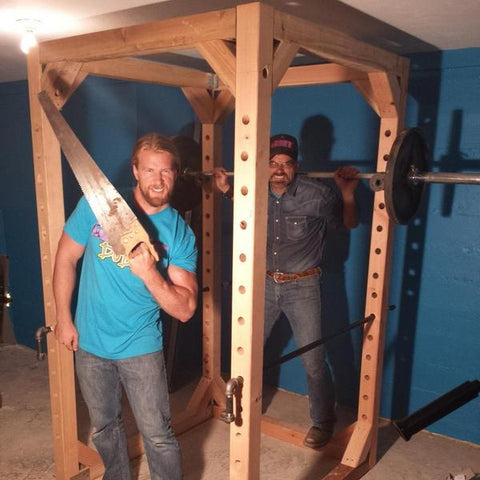
 video mentioned the fact that wood may not be suitable primarily because of a strength issue, while many comments countered with the fact that wood frame construction holds up houses that are one, two and more stories high. It is true wood is very, very strong especially used with it's growth rings in mind. Everyone knows how strong a tree can be. How tall and resilient they are even in the strongest of storms. As a tree grows it adds girth slowly and over time the fibers in a tree are in a cellular way the most natural and strongest of substances. We used a native tree to our area: the Douglas Fir. Each growth ring represents a year of life of the tree and the closer the growth rings the stronger the tree is because it has grown slowly over time, like a buff dude. And like a buff dude the Douglas Fir has the ability to hold huge amounts of weight.
  The basis of the power rack are four up right posts utilizing the natural and most formidable strength of the tree. The posts are cut out of the Douglas fir the same way it has reached for the sun in it's growth. For simplicity and brevity it was important to utilize the 4x4 for the entire construction. At least that's what I thought and it worked.
 Funny how conventions are followed just because it's difficult for us to change things especially when it requires a lot of adaptation that we don't feel like adapting to. And that worked as well for the metric system here. When I was in eighth grade we were supposed to change over, albeit slowly, to the metric system. That was starting in/around 1971-1972. Well we still haven't got there and that has a way of making it difficult to transliterate measurements.
DIY Buff Dudes Power Rack
- 8 - 8 Foot 4x4 Douglas Fir or Equivalent Wood
- 8 - 3x5 Flat Steel Ties (Simpson's Strong Tie TP 5)
- 14 - 1/2x2x2 3/4 90 Degree Steel Ties (Simpson's Strong Tie A23)
- 1 Pound of 2 inch Star Bit Wood Screws
- 1/2 Pound of 3 inch Star Bit Wood Screws
- 1 - 1/8 inch Drill Bit For Pilot Holes
- 1 - 1 1/4 inch Tri Fluted Wood Boring Bit
Racking Pins-
- 2 - Chair Flanges
- 2 - 1 1/2 Inch Pipes
- 2 - Pipe Connectors
- 2 - 4 1/2 Inch Pipes
- 2 - Caps
- 2 - 60 Inch Pipes
- 2 - 4 Inch Pipes
- 2 - 90 Degree Elbows
- 2 - Caps
- 1 - 60 Inch Pipe
- 2 - Caps
- Quart of Flat Black Latex Enamel
- 1 inch Number Stencils
- Can of White Spray Paint.
 You'll want to cut all your lengths from the fur-bu-furs, uh I mean four by fours. Whatever method you have - that is saw speaking - you could even use a chain saw if that's all you have. You can also change dimensions if you want, but we went with the standard size power rack. Then you'll want to drill your holes for safety bars and racking pins. I heard a lot of comments from people who have built the power rack and they pointed out they didn't drill all those holes. Thanks for pointing that out; you don't need to drill all those holes if you don't want to. Makes the build go much faster. I've never used all those holes.
 You have all your pieces cut, time to drill some holes and at this point let me add that the drilling bit you want to use is the Tri Flute Max Speedbor bit made by Irwin tools. Caution these suckers self feed and eat like hell, they have tendency to split the wood so make sure you have a backer board under the 4x4 and they take a powerful drill. Bosch makes a drill bit called the Daredevil that's getting good reviews including less of a tendency to split the wood, also self feeding, so you may want to look for the Bosch, sorry Irwin. Don't use a regular spade bit, it'll take forever. The most laborious part was drilling the holes.
 Pieces are cut, holes are drilled, assembly time. Finally. In the video you'll see we laid the section down on the floor to assemble. Once that first section is done, do the other side then stand them up and this is when it's helpful you have another Buff Dude or Grrrl assist in joining the the sections together. Nice, nice. You're almost done. You've done a beautiful job and you can paint it if you like or stain it or leave it natural, hey it's your power rack. Put a green metal flake paint job on it if you want.
 Now for the pipe. 3/4 inch pipe normally used for water or gas. I found out that in other countries that that pipe may not be so readily available so a substitution may have to be made. The pipe is for the racking pins like seen in the video and the safety bars. Some builders have come up with their own version of racking pins which is awesome. Don't be afraid to veer off the beaten path and invent your own system. As time goes by I'll be adding some cable systems so I can do flys etc.
 So you've done it. You've build you very own power rack. Time to relax and revel in your accomplishment. At least for a few minutes but now it's time to use it. And you will. I'm using mine like crazy now that I'm back into the routine of working out. I love the power rack, so versatile. Especially for squats and bench press.
Also in B.U.F.F. Blog
DIY Landmine Press Machine

With a Landmine Press at your side you can perform exercises such as Squats, Shoulder Press, One Armed Rows and more. And this easy DIY guide shows you how to build one!